
Acrylic paint dip rock painting is a great way to teach your kids how to transform a simple rock to a piece of art.
Rock painting is a rightful passage of being a kid right? It’s an easy craft that kids of all ages can do. Chances are you already have all the supplies at home too! If you want to create a new and fun craft why not try rock painting for kids? Of course, you could always paint the rocks normally but to make the experience more fun, give dip painting a shot! For younger children who can’t paint small details on rocks, this fun activity is great to do. This dip painting method stops the paint from getting too messy so makes the cleanup much easier as well.
This method of rock painting can also be known as acrylic paint float. A few things to note about popular method of acrylic dip painting before we begin;
- Water down the acrylic paint with warm water and thin it out if you want to create a more “marbled” effect on the rocks. Watercolor paint might work too but it won’t color the rocks as vibrantly as other types of paints. Acrylic paint is generally the best kind of paint.
- You can also mix a pouring medium into the acrylic paint for the same marbling effect on this rock project.
Today we will be dipping the rocks into acrylic paint without adding water or a pouring medium to it.
What you will need for acrylic rock painting with the following materials:
Disclosure; this post contains affiliate links. As an Amazon Associate I earn from qualifying purchases. This disclosure statement refers to the rest of the Amazon links in this post. See more on my disclosure page.
- Rocks or pebbles
- Acrylic paint – You can also use marbling paints or craft paint which will spread a little easier but acrylic paints are the best paint for this project
- A container
- Wooden skewers
- Pouring medium (optional)- this creates a more “fluid” marbled look
- Mod podge if you want to seal your work of art with a clear coat

How to paint rocks with an acrylic paint dip technique
Check out this simple process for easy rock painting.
Step 1:
Before you start, make sure the rocks are clean by washing and drying them properly.
Step 2:
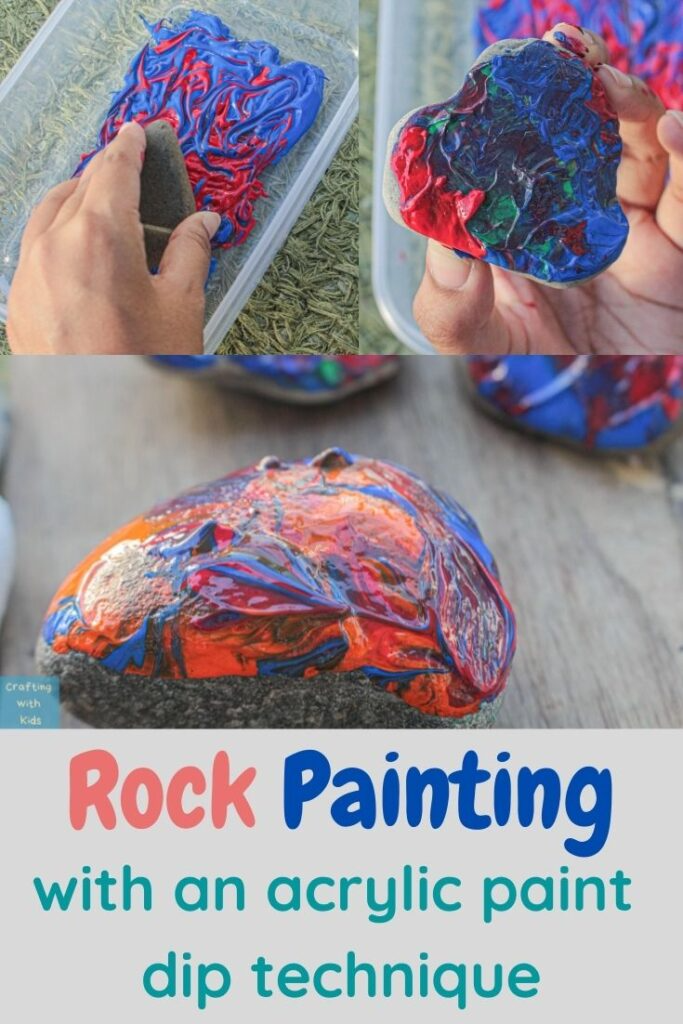
Pour paints of different colors onto different sides of the container but do not mix them. If you have a pouring medium mix that with the paint before pouring into the container. Not having a pouring medium is also completely fine and will not affect the painting process as much. To make the process easier for the kids, use a container that is smaller in height with larger sides.

Step 3:
Take a wooden skewers and swirl it across the different colors to create various patterns. There are absolutely no rules to this so just allow the kids to have fun and swirl it around!


If you are not happy with the results just add a few more drops of color and create more patterns until it turns into something you like.

Step 4:
Once you are satisfied with the patterns created, it is time to start with the dip painting.

If you do not want to get paint on your hands, feel free to wear gloves. But since acrylic paint is pretty easy to clean up, gloves are not entirely necessary.

Start with the base coat. As for the dip painting method, simply hold the rocks with the side you want to paint facing down (flat surfaces are the best part of the rock to paint) and dip them into the containers until the rock touches the paint. Rotate the rocks to cover the surface and also to create more variations in patterns. If you would like to give the kids different options for rock painting ideas, show them different ways they could turn the rocks to create different effects. Or just let them do their own thing and develop their own painting methods and make unique designs.

Step 5:
Once dipped in paint, set the painted rocks aside with the painted side facing up and allow them to air dry. This should not take much time as acrylic paint usually dries up pretty quickly.

Once dried, they are done and ready to be displayed. And now you have made pretty painted rocks using dip painting method! You could also use these to create more crafts that need pretty rocks. Once you have tried this craft of rock painting for kids it might even become a go-to activity whenever they are bored. Now go ahead and experiment with different colors, patterns or even sizes of rocks to create an entire collection of painted rocks!
See more about how to paint rocks for a fun kids craft here! I’ve also included a handful of other rock painting ideas in this post.

Make sure to also check out our Christmas Rock Painting with a Nativity Scene too!

Also check out the different types of rock painting and get a little history about it too.


Acrylic paint dip rock painting
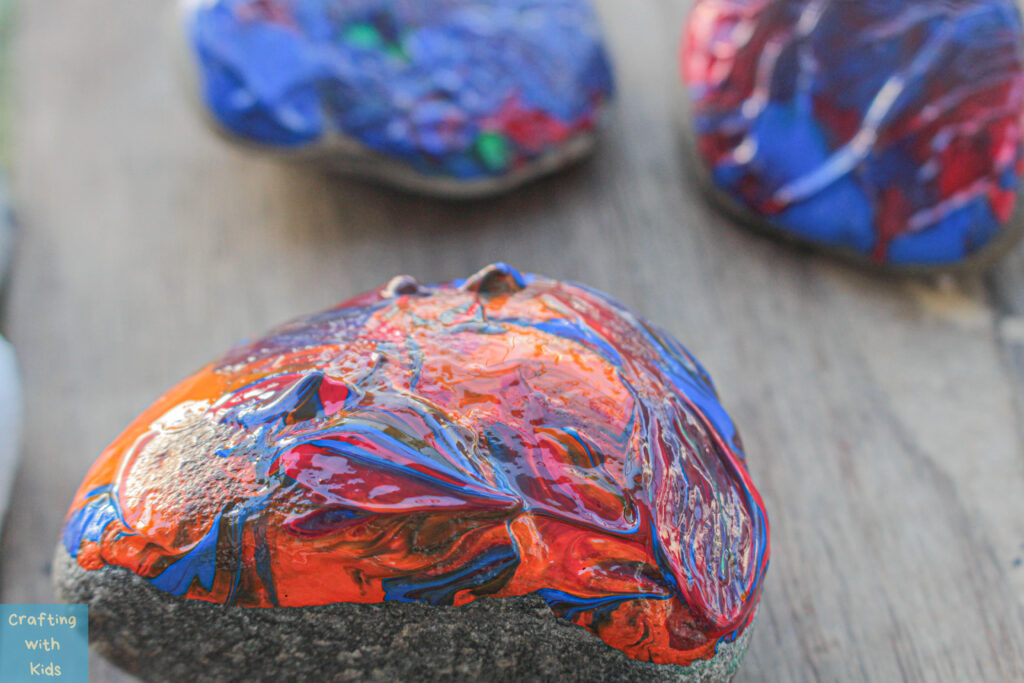


How simple is that? This is one of many different rock painting ideas and techniques. Personally, I think this is one of the simplest methods to paint rocks. What do you think?
If you are looking for another kid friendly paint project, you might enjoy my DIY kid safe nail polish post!
Until next time,
Happy Crafting!
Leave a comment