
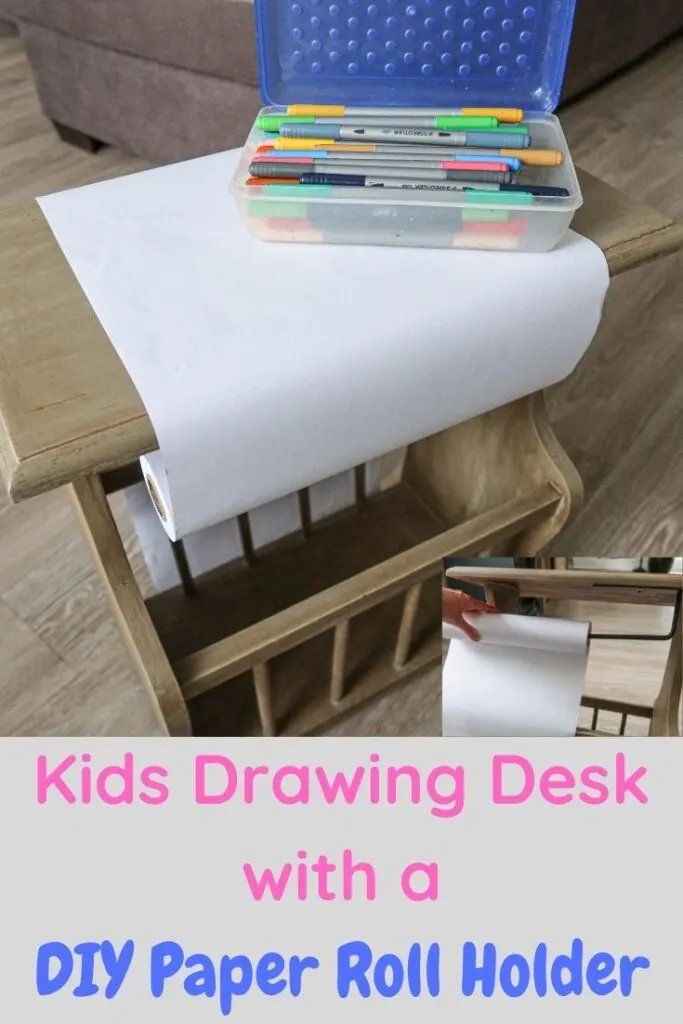
Learn how to make an easy kids drawing desk from an existing table, paper towel roll holder, and a paper roll.
I love encouraging my kids to draw and create. As a matter of fact I’ve added spots all over the house with coloring bins, construction paper and fun learning areas that induce creative skills. The one thing we were lacking was a good kids drawing desk with a DIY paper roll holder. We do have a small IKEA desk, but I wanted to create a desk with a paper roll so we wouldn’t waste so much printer paper.
My daughter loves to color and draw and be creative. I think we go through a ream of paper every week, no joke. I love that she loves to draw. That being said, every now and then this momma gets a little tired of the paper and crayons and markers all over the dining room table all the time. That’s when I decided to make something; a kids drawing desk with a DIY paper roll holder. Y’all, anyone can create this! She even painted her toilet paper roll wind chimes here!
Before I start this project let me share that this isn’t a DIY desk, but an easy project that anyone (especially busy mom’s) can pull together with just a few supplies. Here we go!

How to make a kids drawing desk with a DIY paper roll holder
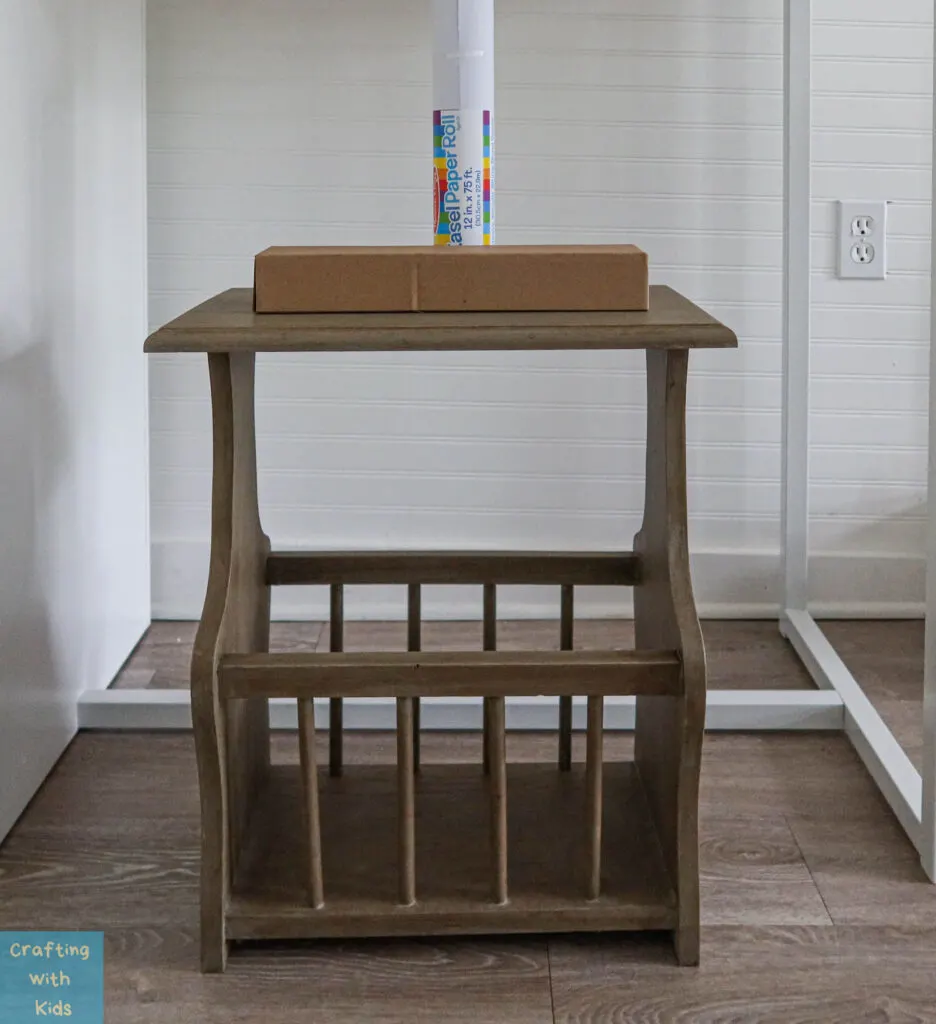
The first thing you need is a small desk, side table, or any flat surface area where you can attach a paper towel roll underneath. Get creative! Head to the thrift store if you don’t have anything that works. Don’t feel like you need to buy something new.
Tip; you could even use a flat piece of wood to make this a portable drawing desk!
Below is a picture of the desk I’m using. It’s my grandfathers old telephone table! It’s the perfect side table and sits in the corner of her room when it’s not being used.

Disclosure; this post contains affiliate links. As an Amazon Associate I earn from qualifying purchases. This does not affect the price you pay. This disclosure statement refers to the rest of the Amazon links in this post. See more on my disclosure page.
Materials to make a DIY paper roll holder
Tips when buying materials;
Before you purchase a paper towel roll holder, make sure to measure the desk/surface to ensure that it will fit. Also, make sure the bars are thin enough to slide the paper roll onto it. Some paper towel rolls have very thick rods that are meant to fit a roll of paper towels, not a paper roll. You can see the links to the items I purchased above.
Also, when purchasing a paper towel roll holder, make sure it’s long enough to fit the size paper roll you intend to purchase.
How to make a DIY paper roll holder for an existing table
- Attach the paper towel roll holder under the existing table top near one of the edges
- Slide the paper roll through the paper towel roll holder
- Pull enough paper out and over the top of the desk to cover the entire top surface
- Draw and create as you like!
- Pull the final artwork paper out and cut it
- Repeat steps 3-5
This is such an easy project y’all! Like I said earlier, there is barely any DIY involved, which makes it a great little project for a busy mom.
See a quick video tutorial on this KIDS DRAWING DESK on YouTube HERE.

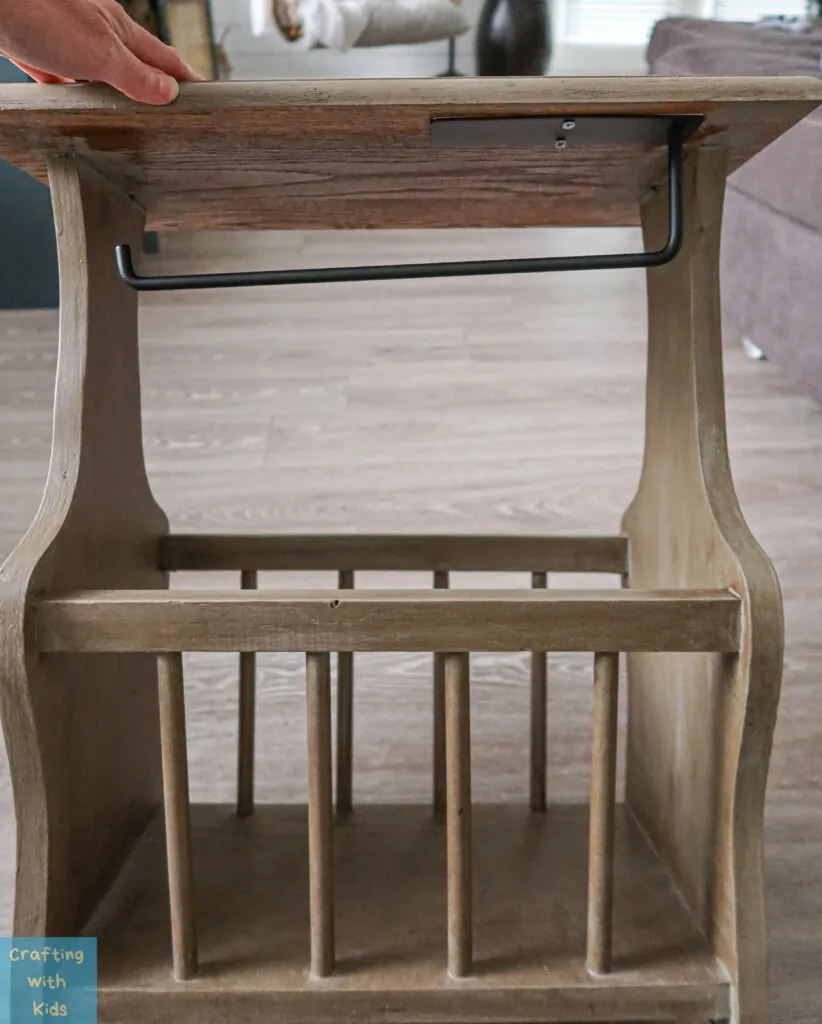
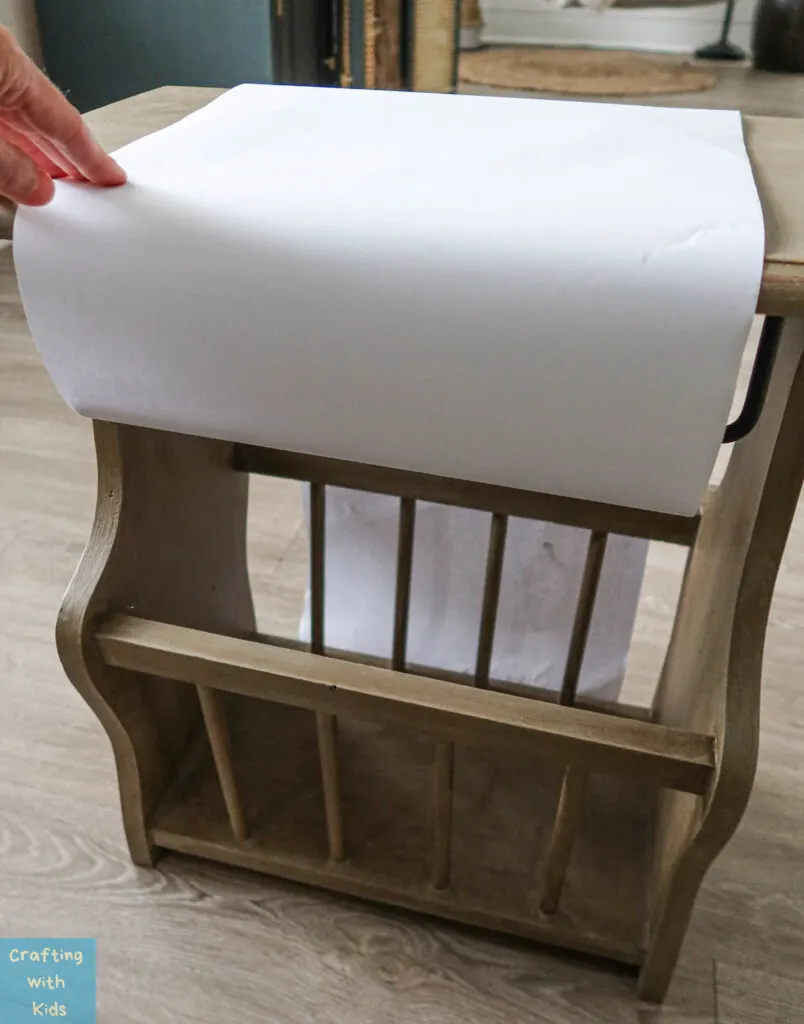
You see how it fits nicely under one edge of the table?

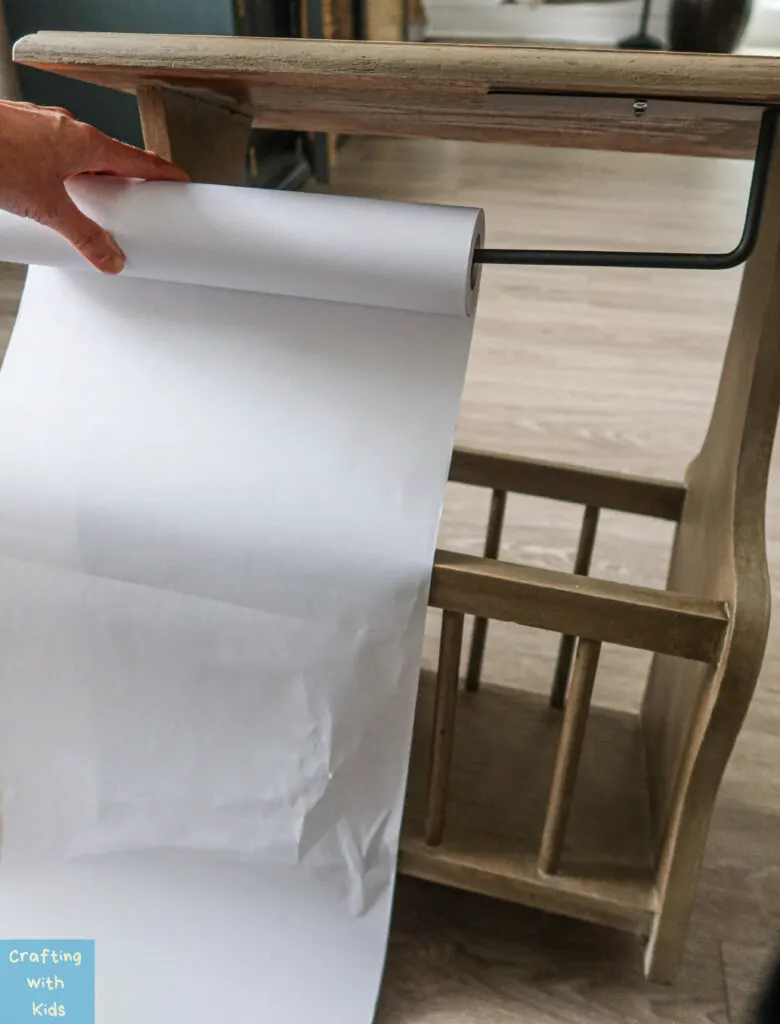
Next slide the paper roll through the paper towel roll holder!

Once the roll is inserted in the paper towel holder, pull the paper out and over the top of the table. Feel free to use a little tape to tape it down on the other side of the table. Paper shifting is no fun when trying to draw.

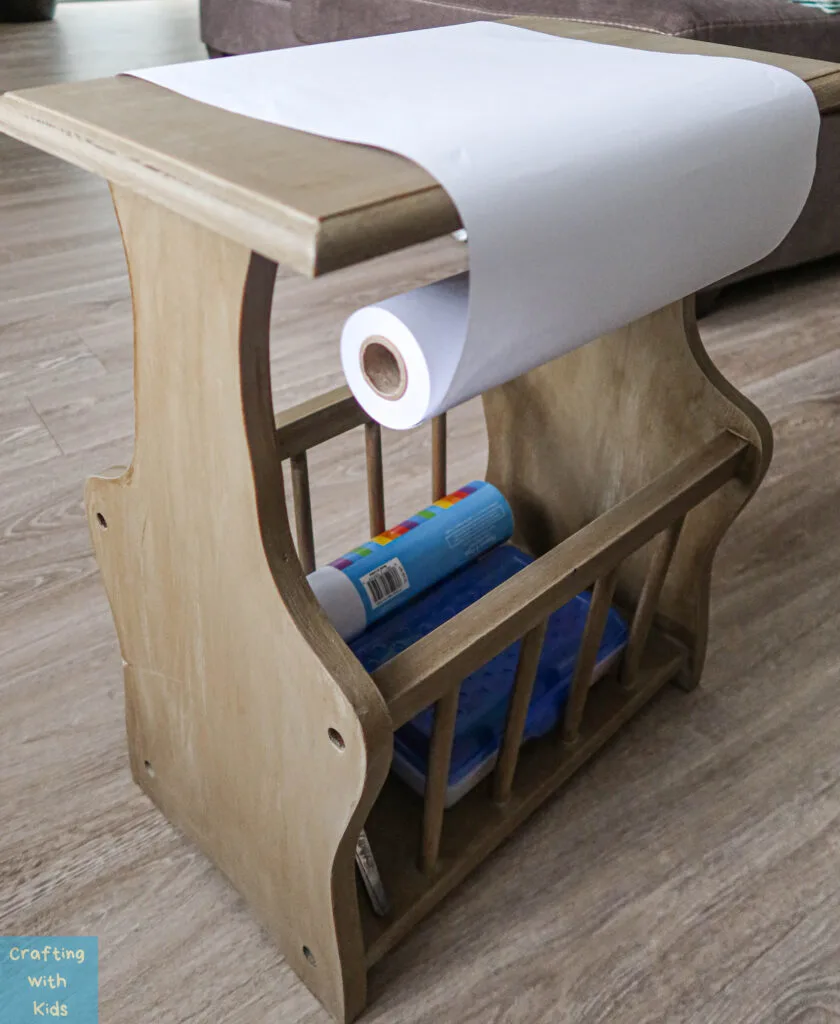
Not only is it a functioning kids drawing desk, but it holds supplies and a paper roll too!

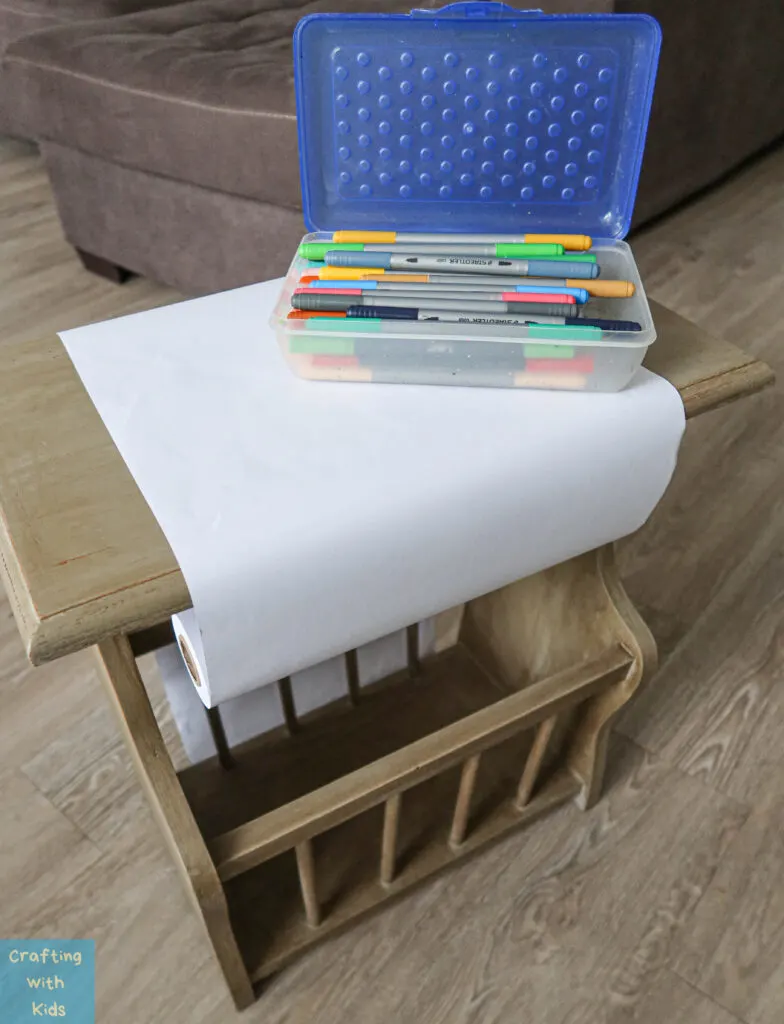
In all of about 5 minutes we have a new kids drawing table. I’m smitten with how easy this was and how functional it will be for my daughter.
I hope this is an easy project that you can create for either yourself or you little ones!
Happy Crafting!
Leave a comment