
Don’t miss these easy 4th of July crafts for preschoolers, including handprint flags, fingerprint resist art, and two fireworks projects using paper plates. All four activities use simple supplies you likely already have, and most take under 30 minutes from setup to cleanup.
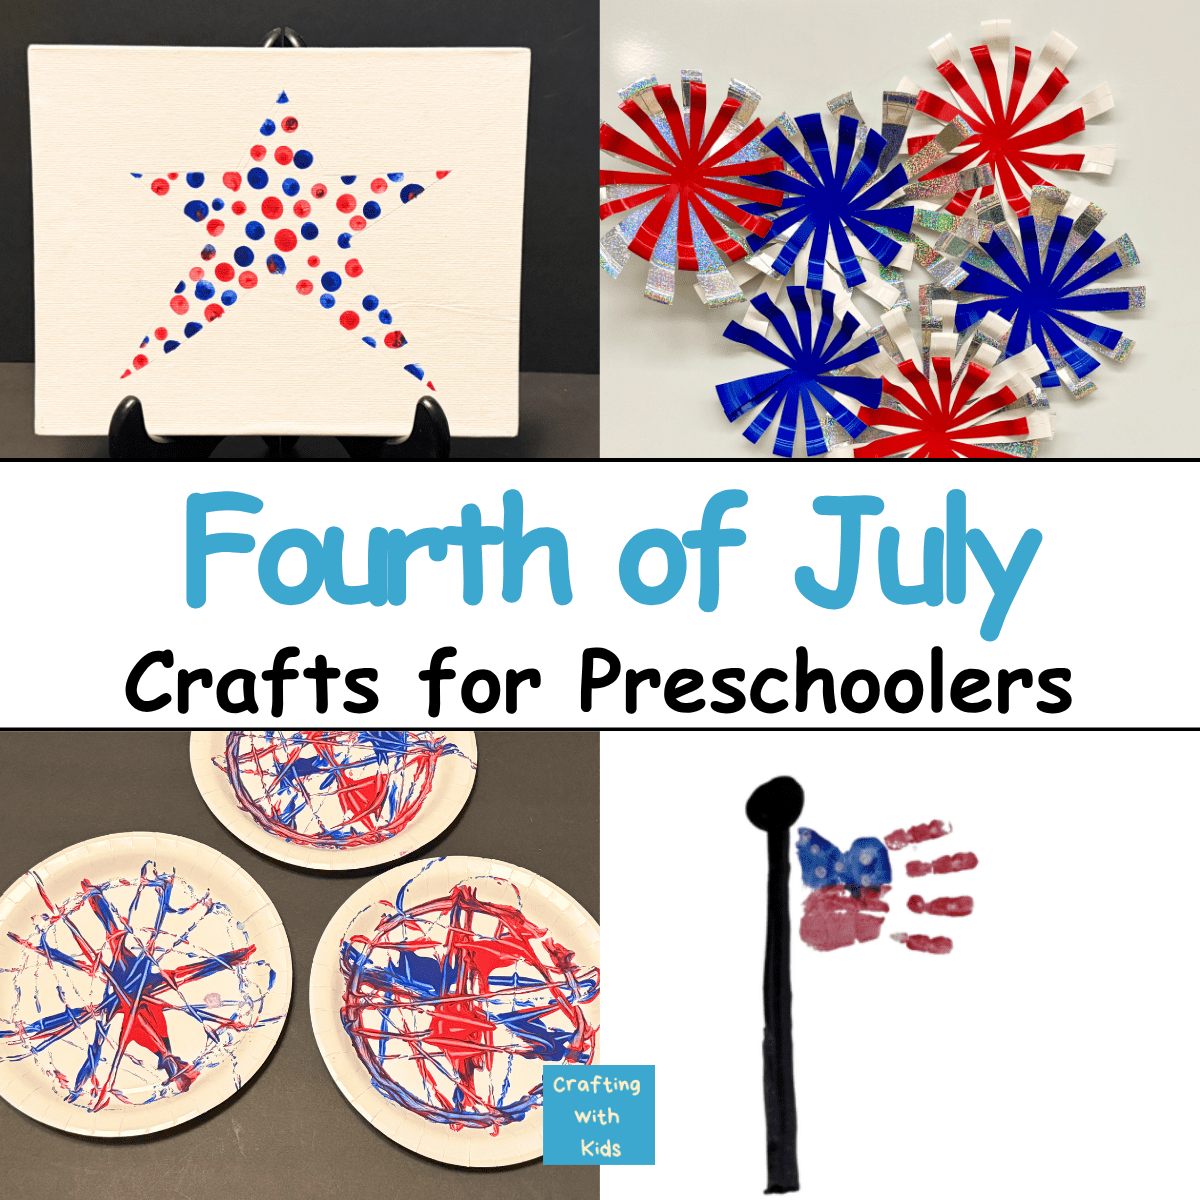
Independence Day Crafts for Preschoolers
Summer has started and the 4th of July is right around the corner. If you are looking for some engaging, hands on, cute and crafty activities to do with your kids, look no further. We have some fun 4th of July crafts for preschoolers (that you can easily adapt with older siblings too) to fill your day with some red, white and blue!
We love a good activity that is low prep, low cost and highly engaging (if you are always hunting for easy preschool activities, you are our people), and if they require minimal supplies and foster creativity all the better in our eyes. We have some simple Fourth of July projects that your kids are going to love. From fingerprints to fireworks we are ready to celebrate Independence Day!
Handprint Flag With Preschoolers
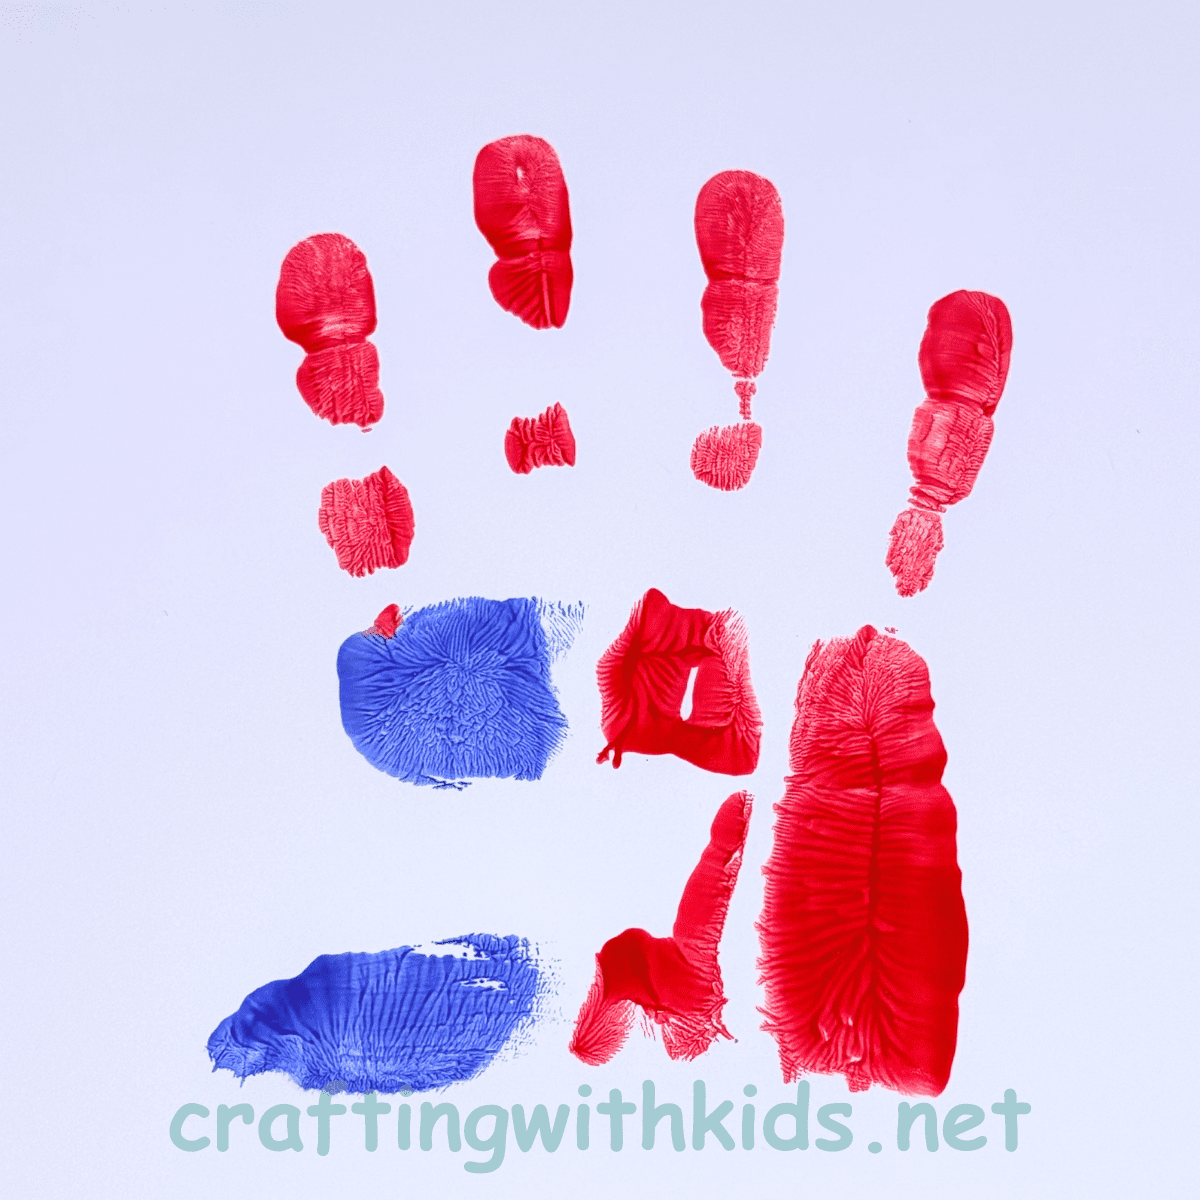
This handprint flag project is one of the sweetest 4th of July crafts for preschoolers because it doubles as a keepsake. There is always something special about handprint projects, preserving those little hands in time is always a favorite around here!
Supplies needed:
- Heavy white paper
- Tempera or Acrylic Paint (Red, Blue, White and Black)
- Paintbrushes
- Wipes or Paper Towels
Handprint Flag Step by Step
Step 1: Paint a flagpole with the black paint onto your paper.
Step 2: Tell your kiddo what they are going to do. “We are going to paint your hand and make a flag print on the paper! Then we will wash it right off!”
Step 3: With your child’s back to you and your arms around them, carefully paint their palm with blue paint and all of their fingers with red paint. Leave their thumb clean.
Step 4: Carefully place their hand on the paper so that their fingers are a little fanned out and it is perpendicular to the flagpole. Press their fingers and palm gently into the paper and then have them peel it up.
Step 5: Grab those wipes and wash their hands to get all of the paint off.
Step 6: Let the paint dry completely.
Step 7: Go back with just a fingertip in white paint and add the “stars” to the flag picture with their little fingerprints.
Some kids get nervous about having paint on their hands, so talking it through first lets them be part of the process! This project is easily adapted to older kids by giving them more independence. For example, letting them paint their palm and fingers themselves. It will take a good deal of coordination and patience for them. No matter the age, they’re sure to love the end results!
Fingerprint Star Resist Art with Kids
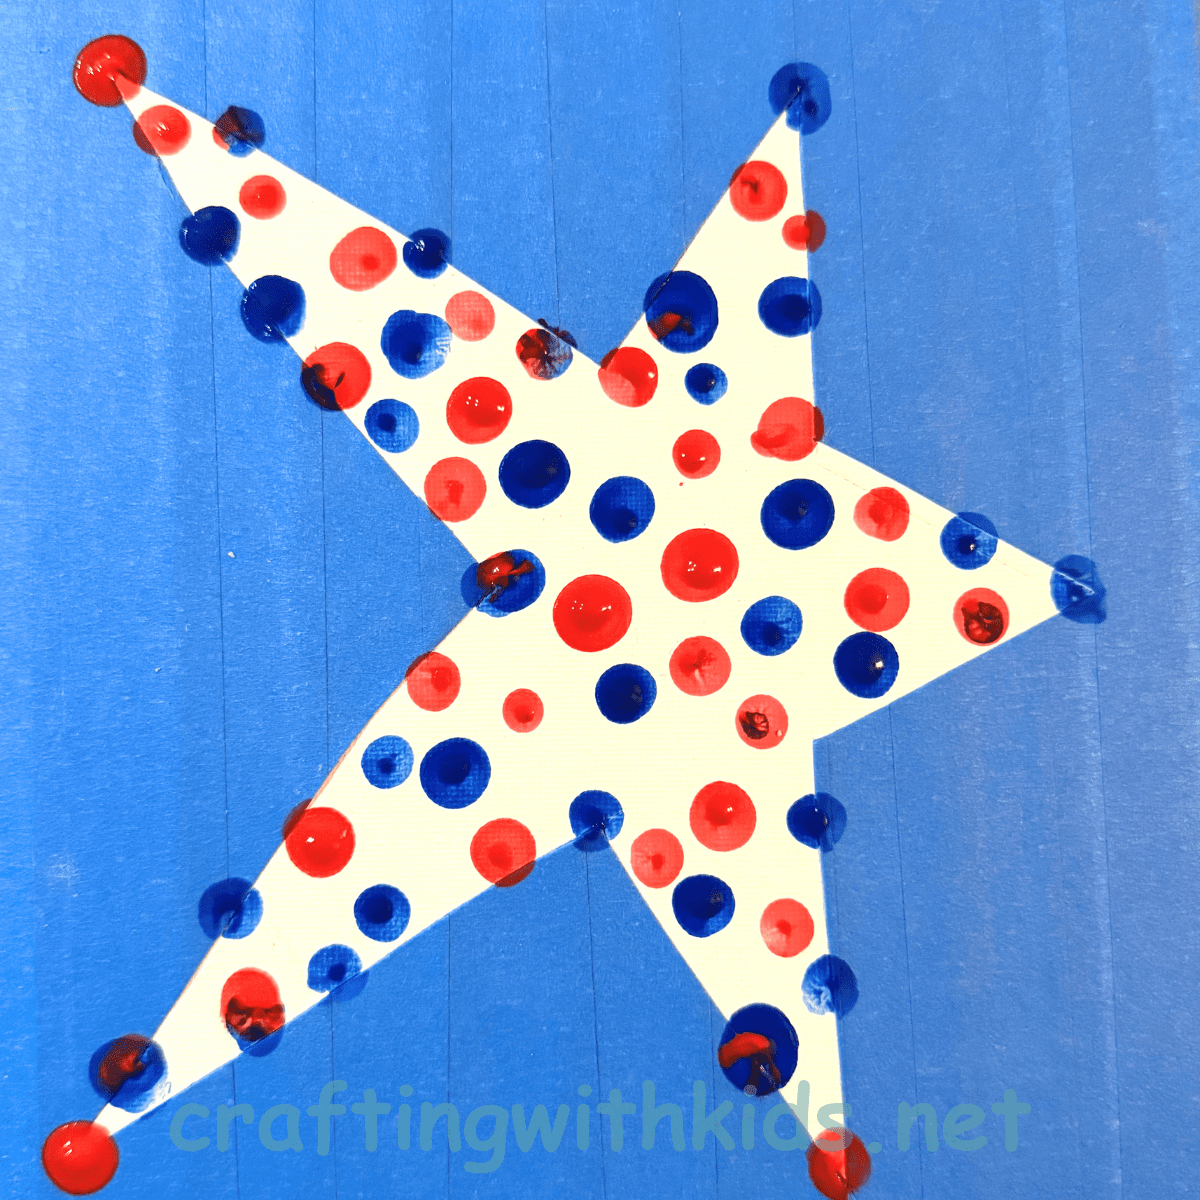
Resist art is one of the most magical 4th of July crafts for preschoolers because there is a big “reveal” moment at the end that kids absolutely love. Resist pieces are fun for kids because there is a “magic” reveal at the end. These projects have you lay down tape or stickers to mask off part of your paper and then paint around it. At the end you peel off the tape to reveal your finished piece.
Supplies needed:
- Heavy white paper or tiny canvas
- Tempera or Acrylic Paint (Red, Blue and White)
- Plastic paint palette
- Painters tape
- Wipes or paper towels
- Scissors or craft knife (adult only!)
Fingerprint Star Resist Art Step by Step
Step 1: Create a star or stars out of painters tape on your paper. You can either have a star cut out or cover just an area with a star shape.
Step 2: Squirt some paint on a plastic paint palette so it is easy for the kids to access and keep the colors separate.
Step 3: On a scrap piece of paper show the kids how to dip their fingertips into the paint and then make a fingerprint dot on the paper. Show them that they want to try to keep the colors separate and use one finger for red paint and one for blue because when you mix the colors together you end up with purple! (Great opportunity for a chat on color mixing!)
Step 4: Set the kids to work. They should make dots in red and blue paint all over the paper, making sure to get all around the outside of the shape so you will have a clear outline at the end. (This step can take a while, let the kids work it out so the piece is authentic to them.)
Step 5: Clean up the kids and let the paint dry.
Step 6: Gather around for the big reveal! Peel off the painters tape (work slowly) to reveal the star under the red and blue dots!
Resist art reveals are always a big hit with little kids. I love the ooooooos and ahhhhhhhs that come along with the peeling of the tape! It’s all part of the process. Enjoy all the little steps! If you want to think about how activities like this build patience and focus in your kids, teaching children patience is a great read to have in your back pocket.
Paper Plate Fireworks
Paper plate fireworks are an easy, low-cost option that can be done two different ways depending on your child’s age and skill level.
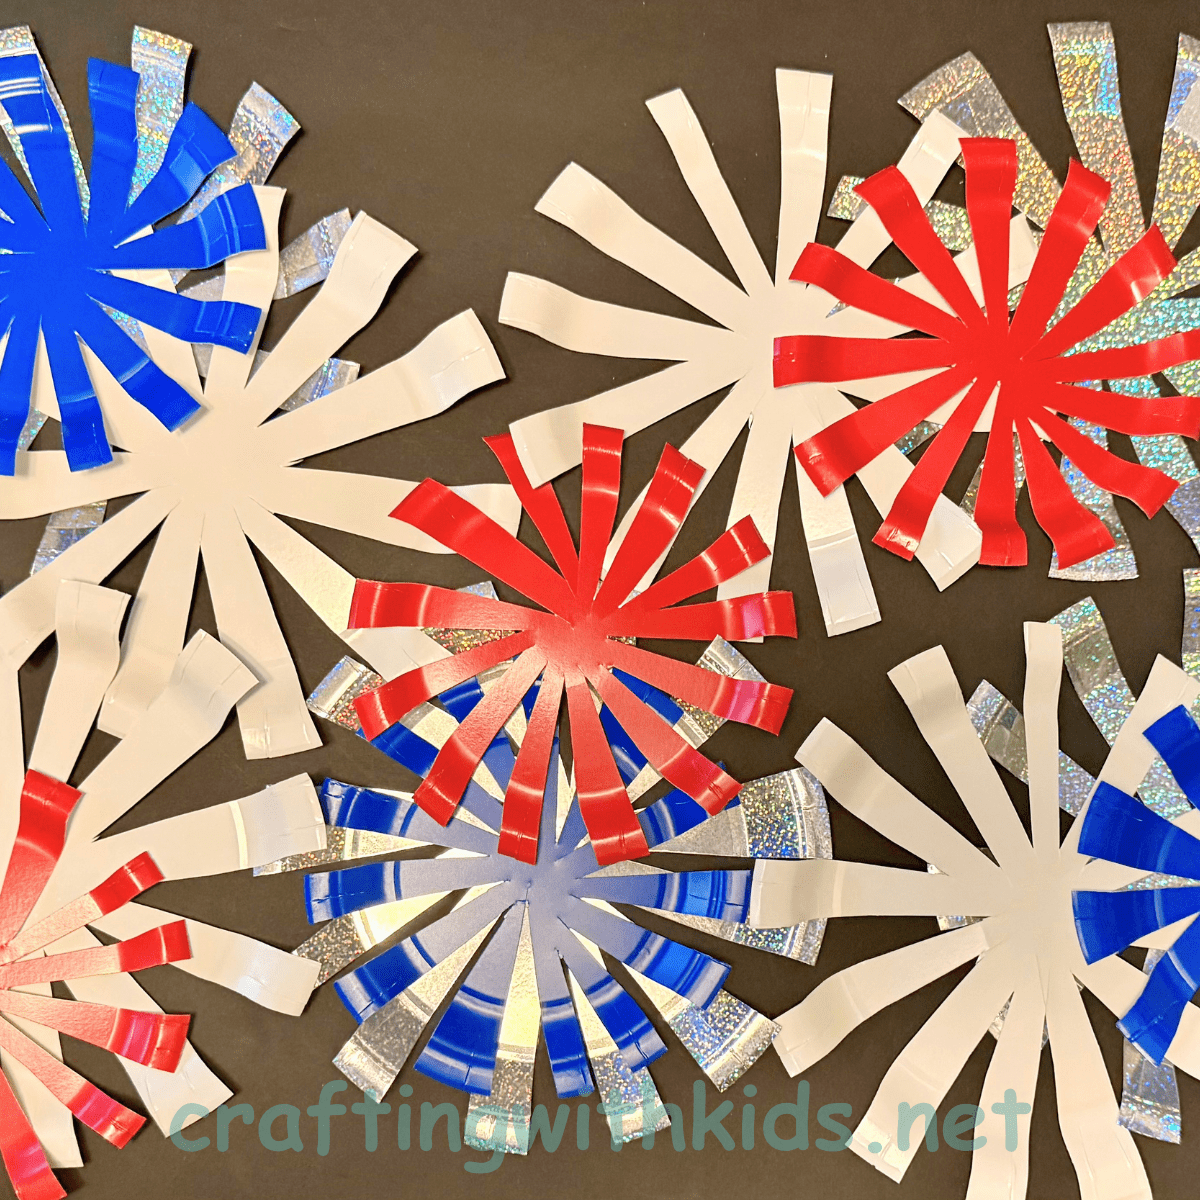
A dollar store run is all you need to make a cute fireworks display for your home. This is especially cute on a doorframe or window, but just as sweet on a posterboard and hung up to welcome in the holiday!
Supplies needed:
- Black posterboard or foamboard (if you want to hang it)
- Painters tape
- Red, white, blue and sparkly paper plates in different sizes
- Scissors
Paper Plate Fireworks Step by Step
Step 1: Give each child an array of plates to work with and a pair of scissors appropriate for their age.
Step 2: Show the kids how to cut slits or “V” shapes or both out of the plates all the way around. Let them know they shouldn’t cut all the way across the plates or their fireworks will fall apart.
Step 3: Let the kids start cutting. Cutting is a skill that needs to be worked on and doesn’t come easily to all kids. If your child isn’t ready for cutting, work on it with them. Have them hold the scissors thumbs up and if they aren’t ready for long lines or “V” shapes have them just do simple one snips around the exterior of the plate!
Step 4: Once all of the plates have been cut, use the painters tape to arrange them on the paper so they look like fireworks exploding in the sky! (Quick tip: all those cut out discard pieces are perfect for layered art projects! Hold onto them!)
Such a simple concept, just scissors and plates, but such a cute outcome, and an amazing skill building project. Using scissors builds fine motor skills, hand-eye coordination and bilateral coordination! Can’t beat that!
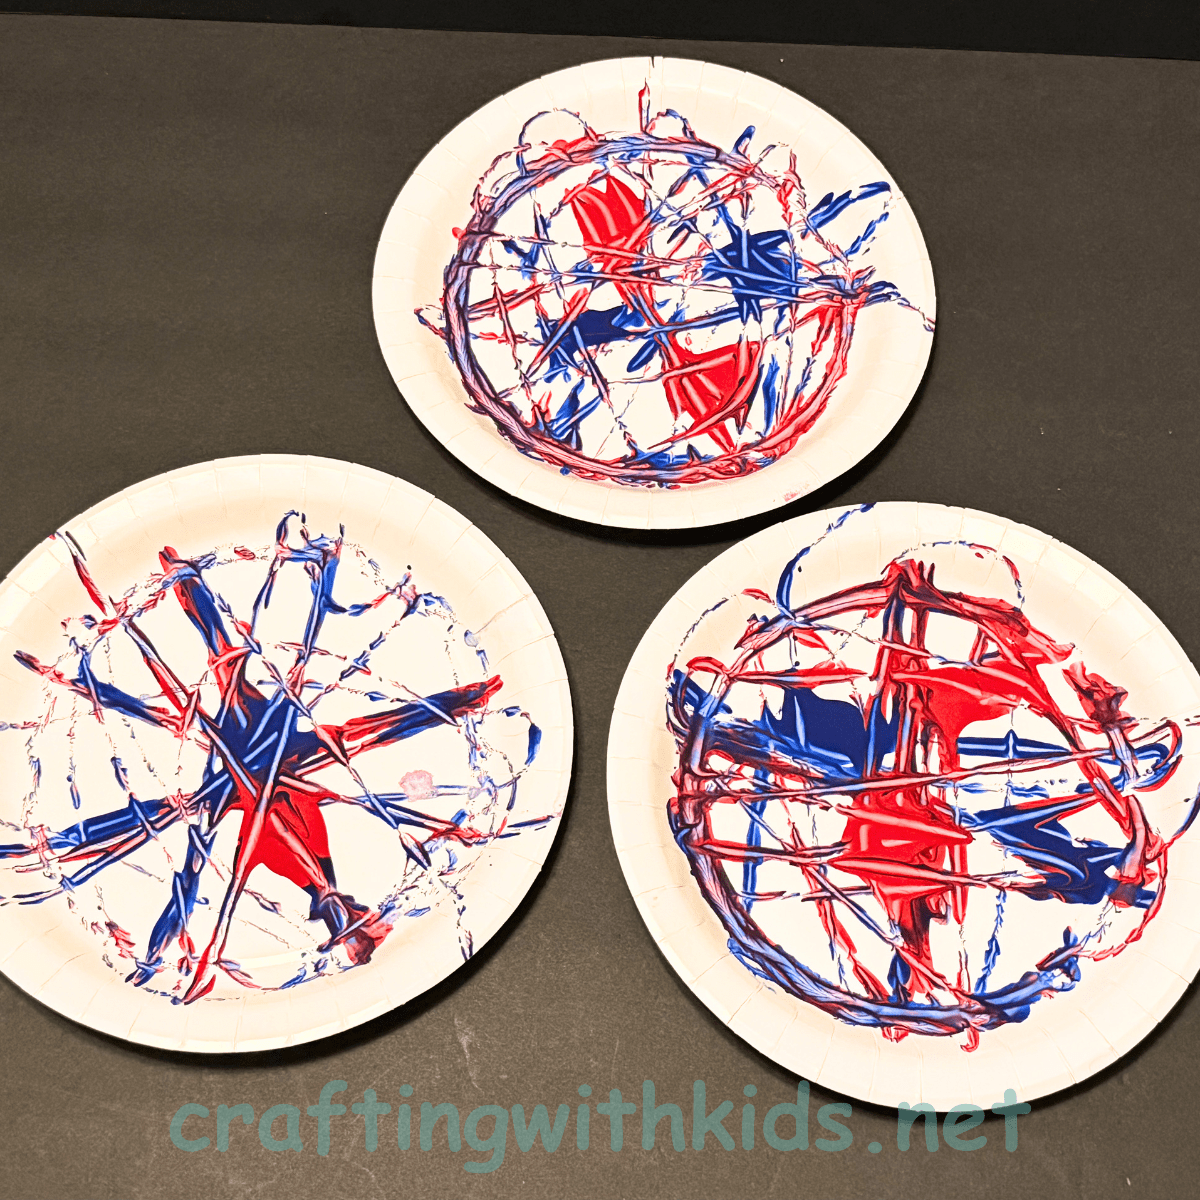
Marble Roll Fireworks with Kids
Using the power of gravity you can make super cute fireworks pictures by rolling marbles through paint. The kids love this one!
Supplies needed:
- Black or white paper plate
- A tin pan (like a disposable cake pan)
- A marble
- Red, white and blue paint
- Painters tape
Marble Roll Fireworks Step by Step
Step 1: Put your paper plate in the bottom of the tin pan. You can use a piece of painters tape rolled underneath it to secure it in place.
Step 2: Put a small dot of each of the paints near the center of the pan spaced a half inch apart.
Step 3: Show the kids how they will tilt the pan to roll the marble back and forth.
Step 4: Place a marble in the pan and let the kids roll it back and forth and forward and back by tipping the pan in different directions. Tell them that when they tip the pan the force of gravity is pulling the marble toward the ground and rolling it through the paint.
Step 5: Carefully remove the marble and let the paint dry.
This is another fun “wow” project to do with the littles. It’s so much fun to watch the marble roll through the paint and make lines and trails around the paper plate. When it’s dry, hang up your fireworks art!
All of these simple 4th of July crafts for preschoolers and beyond are so much fun. Minimal materials and prep are the keys to amazing crafts with kids. Most of these ideas you probably already have the materials to do today! As a bonus, these activities are great for fine motor skills, cognitive development, and sensory exploration. Looking for more ways to keep the little ones engaged this summer? Check out these Fourth of July Books for Preschoolers to round out your holiday celebration! Let’s celebrate the 4th!
FAQS
What are some easy 4th of July Crafts for Preschoolers?
Handprint flags, resist art, and fireworks crafts are just a few fun ideas to craft with kids for the 4th of July.
How can I celebrate the Fourth of July with preschool-aged kids?
Kids love to get their hands into a good craft project. Use the time that you’re working on the crafts together to talk to the kids about the process and about the holiday. Pair it with some great 4th of July Books for an easy full-day celebration!
What materials do I need for preschool Fourth of July crafts?
Paper, paint, scissors, paper plates. Think simple materials. Kids crafts don’t need a lot of materials to make them memorable and fun!
More Simple Crafts for Kids
- Toilet Paper Roll Flower Crafts for Kids of All Ages
- Boost Fine Motor Skills with Free Printable Eyes for Crafts
- Whale of a Time: Fun and Easy Whale Crafts for Preschool!