
Easy 4th of July Kids Activities: Patriotic Sensory Bin and Calming Jar
TL;DR: These two patriotic sensory play setups (a red, white, and blue sensory bin filled with colored rice and a glitter calming jar) are low-prep, budget-friendly, and endlessly engaging for kids ages 2 to 7. You'll find step-by-step instructions for both, plus tips for mess control and cleanup, all using supplies you likely already have at home.
Table of Contents
- Why Is Sensory Play Such a Great Activity for Kids?
- How Do You Make a Red, White, and Blue Sensory Bin?
- What Do You Need to Make a 4th of July Sensory Bin?
- How Do You Put Together a 4th of July Sensory Bin Step by Step?
- How Do You Make a Patriotic Calming Sensory Jar?
- Frequently Asked Questions About 4th of July Sensory Bin and Calming Jar
Sensory bins and calming jars are two of the easiest, most inexpensive 4th of July kids activities you can set up — the kids love them, and honestly, so will you.
If you are looking for a simple, low-prep way to keep kids busy and engaged, sensory play is a perfect tool to keep in your back pocket! It is hands-on, open-ended, and gives kids a chance to explore textures and colors and make discoveries while they play.
Red, white, and blue colored objects are the stars of this sensory play setup (it's perfect for these 4th of July kids activities), but sensory play can be easily adapted for any season, holiday, or special occasion, keeping kids engrossed and excited all year long. If you're looking for even more patriotic inspiration, check out these Patriotic Activities For Kids.
Sensory exploration is one of those activities that looks like kids are just playing around with a bunch of random things, but kids are actually learning so much as they scoop, pour, dig, and uncover. DIY sensory bins help build fine motor skills, encourage creativity, and give kids a calming, focused activity they can return to again and again.
The best part is that this setup is completely flexible. You can make sensory bins as involved or as simple as you want and most of the time you can use supplies you already have at home so they're easy to throw together anytime. Plus, they are easily adjusted based on the ages of your kids, and set up in just a few minutes.
We are going to walk through two fun variations of sensory play today: a red, white, and blue sensory bin to dig around in for some great tactile play and a simple calming sensory jar that kids can shake, swirl, and watch.
Let's jump into what you need and get started on making these amazing DIY sensory bins for the kids.
How Do You Make a Red, White, and Blue Sensory Bin? {#red-white-blue-sensory-bin}
Making a red, white, and blue sensory bin takes about 10 minutes of active prep (plus overnight drying time for the rice) and uses items you can find at the dollar store or already have at home. Sensory bins are an amazing tool for open-ended, hands-on play that kids love. I love to make holiday themed bins with little toys for each time of the year!
IMPORTANT NOTE: Sensory bins are not generally an independent play situation. They require supervision and guidance because they often have small items hidden in them. They are a great way for you to challenge your child and play along with them!
Let's put together a red, white, and blue sensory bin to celebrate the 4th!
What Do You Need to Make a 4th of July Sensory Bin? {#what-do-you-need}
Please remember that sensory bins can be made with endless items and combinations — these are just some ideas to get you started. You can make them with your kids' favorite colors and toys to keep them in love with the bin!
Time: About 10 minutes of active prep, plus overnight drying for the rice | Mess Level: Medium | Ages: 2 to 7 (with supervision)
For this bin you will need:
- Plain White Rice
- Zip Top Bags
- Food Coloring
- White Vinegar
- Cookie Sheet
- Paper Towels
- Clear Plastic Bin with a Top
- Red and Blue Plastic Gems
- Red and Blue Poker Chips
- Small Cups (like bathroom cups or plastic shot glasses)
- Other "tools" like wooden tongs or spoons are fun for exploring too
- Fitted bed sheet
Other Filler Items (if you don't want to use rice):
- Sand
- Red, White, and Blue Gift Filler
How Do You Put Together a 4th of July Sensory Bin Step by Step? {#step-by-step-sensory-bin}
Step 1: Decide on your filler. We are going to color rice for the bin today, but I want to say that another favorite for me is colored paper shreds — like gift fill or even using a paper shredder and some colored paper. It is zero prep, open the bags and dump it in!
Step 2: Color the rice.
- Add 2-3 cups of plain white rice to a gallon size plastic zip top bag.
- Add 1 teaspoon of white vinegar and 10-20 drops of food coloring per cup depending on how dark you want your color per cup of rice.
- Zip the top shut and shake the bag vigorously. You will see the color spread.
- When the rice is completely colored, dump it on a paper towel lined baking sheet to dry completely. (This is a great step to do before bed so the rice can dry overnight.)
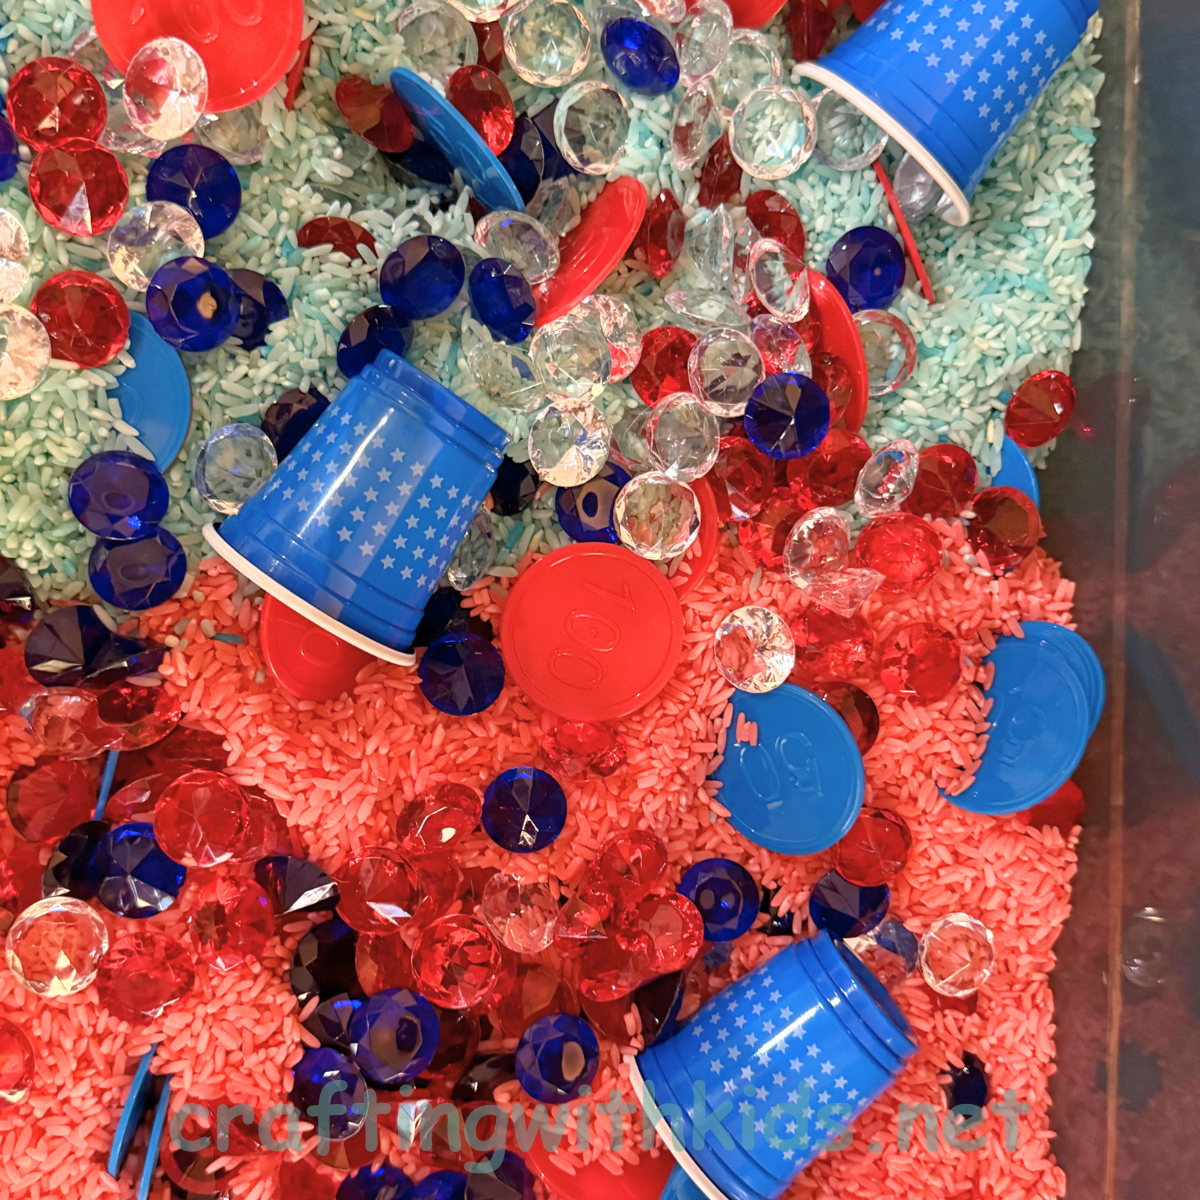
Step 3: Pour the rice into the plastic bin.
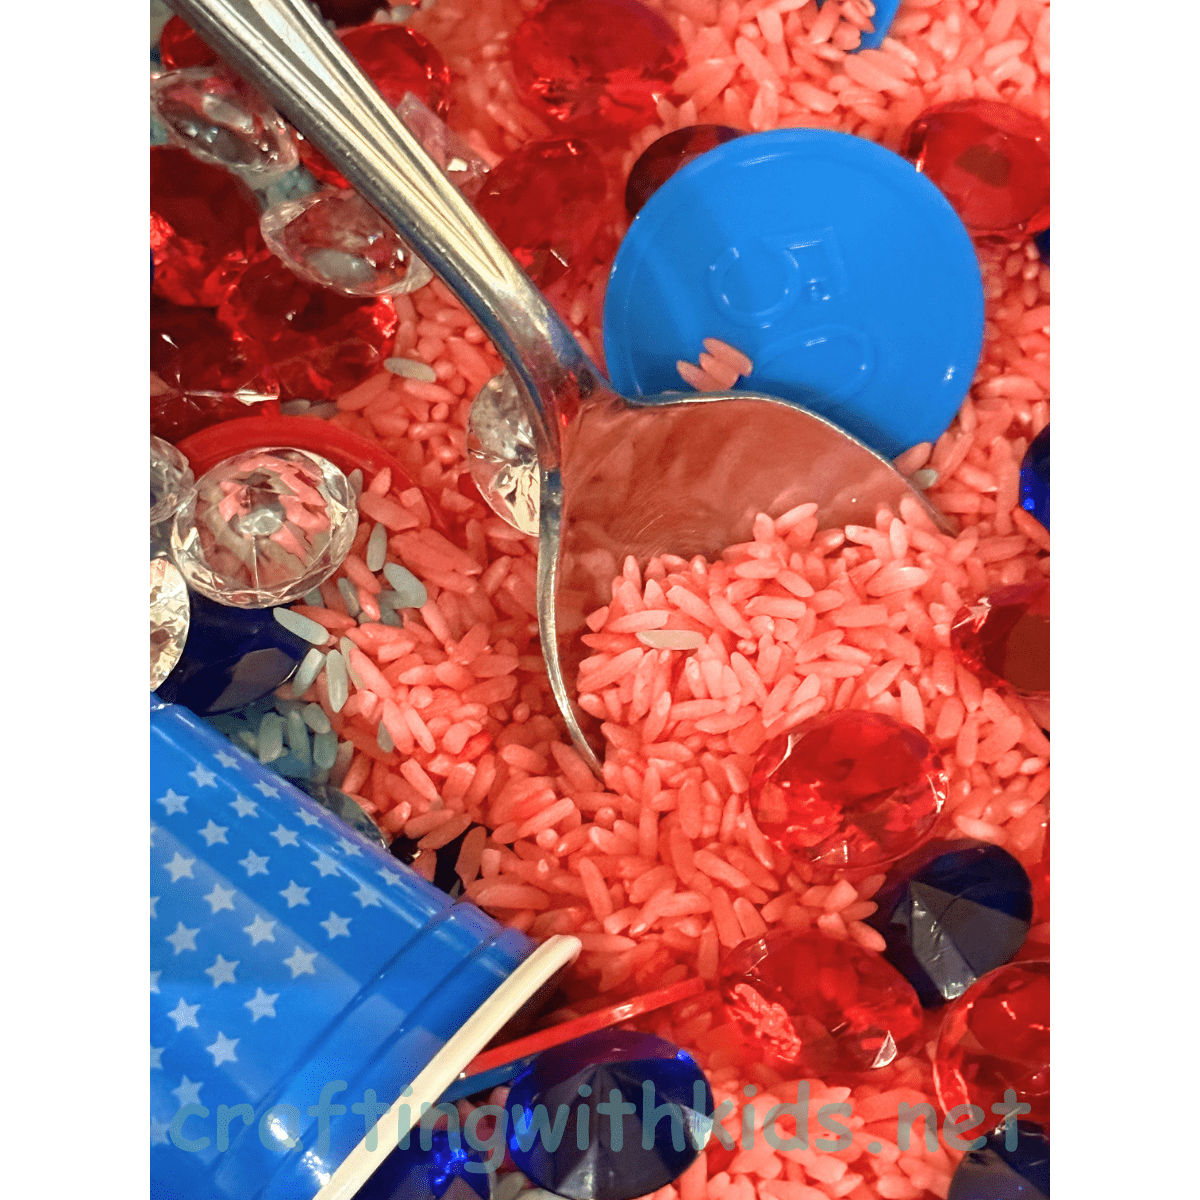
Step 4: Add your gems, poker chips, and any other objects you want to hide in the rice.
Step 5: Gently stir the objects into the rice, trying to keep it separated until the kids get involved so they can see the colors!
Step 6: Cover the table with an old fitted sheet. It makes it easy to gather up anything that spills over and keep that mess contained!
Step 7: Give the kids the tools like little cups, spoons, and grabbers and let them play.
Encourage the kids to find something specific, or a certain number of one of the items.
Can you find 5 blue circles?
Can you find 3 red gems?
There are so many learning opportunities. Digging, finding, and burying are wonderful for building fine motor skills! Sensory play is also a beautiful way to teach your children patience as they work through the bin and practice focused, calm play.
How Do You Make a Patriotic Calming Sensory Jar? {#calming-sensory-jar}
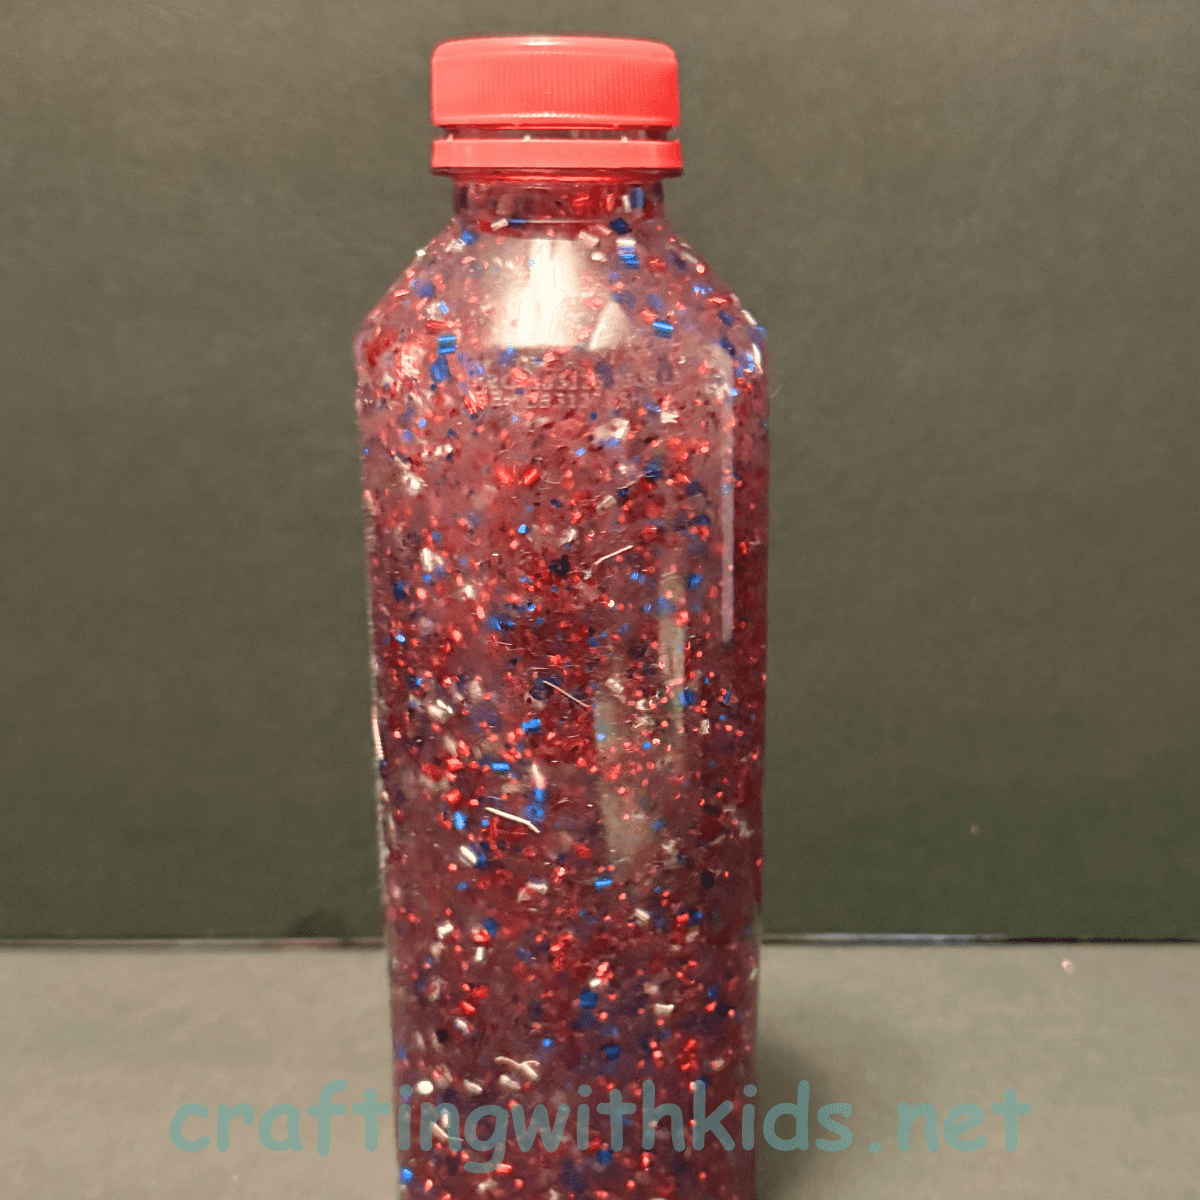
Making a calming sensory jar takes less than 5 minutes and uses just a handful of basic supplies — and the result is genuinely mesmerizing for kids (and adults, honestly).
If you've never seen a calming sensory jar, you're in for a treat. They are so fascinating to sit and watch.
The jars have corn syrup and water mixed with various kinds of glitter and when you shake it or flip it the glitter swirls and falls and rises and absolutely mesmerizes the kids! They take just a couple of items and a few minutes to put together.
If you love this idea, Teaching Mama has a great variation with their 4th of July Sensory Bottle worth checking out too!
What Supplies Do You Need for a Calming Sensory Jar?
You only need a handful of items to pull together a beautiful calming sensory jar. Here's what to gather:
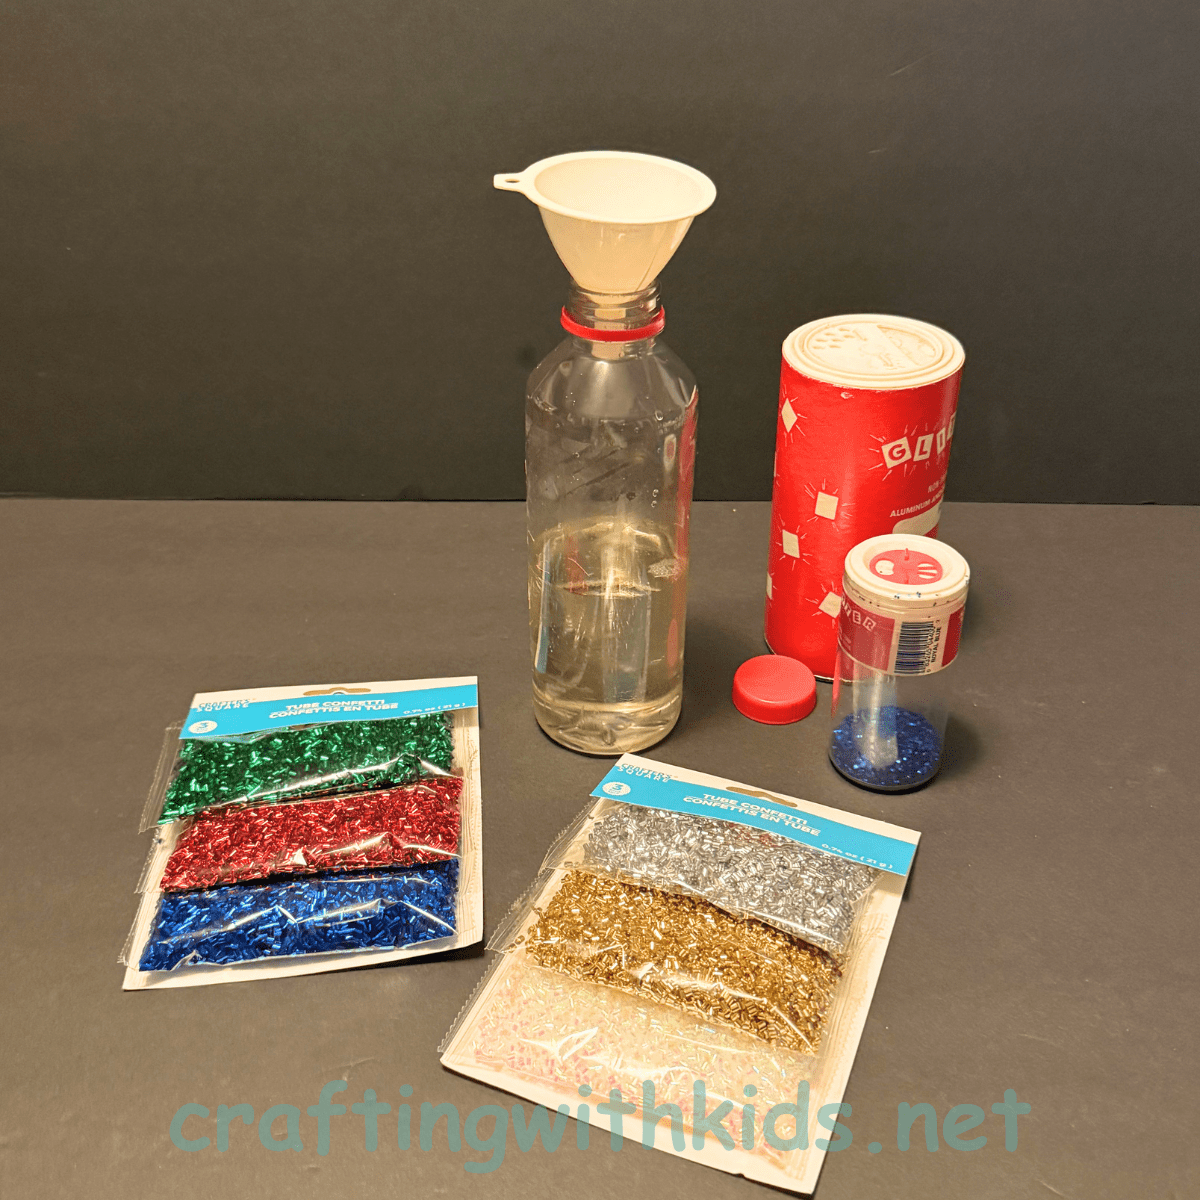
- A clear, clean plastic bottle with a tight fitting lid
- Light Corn Syrup
- Warm (not hot) water
- Dish Soap
- Various colors and sizes of glitter (we are using red, white, and silver for the upcoming 4th of July holiday!)
- Super Glue
- A funnel (the funnel is really optional, but if the kids are helping make it, it could save you a glitter bomb!)
How Do You Build the Sensory Jar Step by Step?
Follow these steps and you'll have a beautiful swirling jar ready in just a few minutes.
Step 1: Fill your jar about halfway with light corn syrup.
Step 2: Add the glitter — maybe a tablespoon in total if you're using various colors or sizes.
Step 3: Add 2 drops of dish soap. You really only need a little because you don't want it foamy, just enough to act as an anti-clumping agent.
Step 4: Fill the rest of the jar with the warm (not hot) water, leaving maybe an inch at the top to make adjustments if you need to.
Step 5: Screw the cap on and tip the bottle upside down to mix the water, glitter, and corn syrup together.
Step 6: Watch the swirling. Make sure it's the way you want it. If it seems to be falling too fast, add a little more corn syrup. Too slow, add a little more water. Clumping, add another drop of dish soap.
Step 7: Once you're happy with the way it is swirling and falling, use some superglue to fix the cap in place. You do NOT want the kids to be able to get this cap off — between the glitter and the corn syrup you would have a huge mess.
Step 8: Have the kids check it out! They will love to watch the pieces swirl and drop and raise back up. Remind them — these are watching jars, not rough-housing jars.
See how simple these jars are to put together? It's always amazing to me how something so simple can be so engaging to the kiddos. I love to use these sensory jars around bedtime when we're settling in for the night. They really are calming — for all ages. I promise you will love them too.
I also love that you can adapt them to any holiday or season by adding different colors and kinds of glitter. I've even added tiny toys to the mix (just make sure they're not toys the kids will try to get out). I hope you'll try these jars for yourself!
Sensory play is one of those projects that will never go out of style. The tactile and focused nature of the play, whether hands-on or visual, is an amazing tool to help kids develop skills that they will use their entire life. You are encouraging them to notice and really take in the world in front of them! Take some time to explore sensory play with your kids! And if you want more ideas like this, these easy preschool activities are a great place to start!
Frequently Asked Questions About 4th of July Sensory Bin and Calming Jar {#faq}
How Long Does Colored Rice Last for a Sensory Bin?
As long as it stays completely dry, colored rice can last for months or even years! Store your red, white, and blue rice filler in an airtight container or a sealed zip-top bag after playtime. If it accidentally gets wet from water play or wet hands, I would throw it away to prevent mold.
What Age Is This Red, White, and Blue Sensory Bin Best For?
Sensory bins are wonderful for toddlers, preschoolers, and early elementary-aged children (roughly ages 2 to 7). REMINDER: Sensory bins are not generally an independent play situation. They require supervision and guidance because they often have small items hidden in them. They are a great way for you to challenge your child and play along with them!
My Colored Rice Is Clumping or Bleeding. What Did I Do Wrong?
If your rice is clumping or the color is rubbing off on your hands, it usually means it hasn't dried completely. To fix it, be sure to spread the rice out in a thin layer on a baking sheet and let it dry overnight. Also, the vinegar acts as a binder to lock the food coloring onto the rice, so don't skip that step!
Can I Use a Glass Jar for the Calming Sensory Bottle?
We highly recommend using a clear plastic bottle or jar rather than glass. While the superglue will keep the lid securely attached, plastic is much safer for kids overall.
How Do I Clean Up Sensory Bin Messes Easily?
The best trick for containing sensory bin mess is to place a fitted bed sheet underneath the entire play area on the floor or table. It also helps to think about building a predictable routine around cleanup so kids know what to expect when playtime is over.
What Can I Use Instead of Light Corn Syrup for the Calming Jar?
If you don't have light corn syrup on hand, clear school glue or clear dish soap mixed with warm water will also work to slow down the glitter!
How long does colored rice last for a sensory bin?As long as it stays completely dry, colored rice can last for months or even years! Store your red, white, and blue rice filler in an airtight container or a sealed zip-top bag after playtime. If it accidentally gets wet from water play or wet hands, throw it away to prevent mold.
What age is this red, white, and blue sensory bin best for?Sensory bins are wonderful for toddlers, preschoolers, and early elementary-aged children (roughly ages 2 to 7). Sensory bins are not generally an independent play situation. They require supervision and guidance because they often have small items hidden in them. They are a great way for you to challenge your child and play along with them!
My colored rice is clumping or bleeding. What did I do wrong?If your rice is clumping or the color is rubbing off on your hands, it usually means it hasn't dried completely. Spread the rice out in a thin layer on a baking sheet and let it dry overnight. The vinegar acts as a binder to lock the food coloring onto the rice, so don't skip that step!
Can I use a glass jar for the calming sensory bottle?We highly recommend using a clear plastic bottle or jar rather than glass. While the superglue will keep the lid securely attached, plastic is much safer for kids overall.
How do I clean up sensory bin messes easily?The best trick for containing sensory bin mess is to place a fitted bed sheet underneath the entire play area on the floor or table.
What can I use instead of light corn syrup for the calming jar?If you don't have light corn syrup on hand, clear school glue or clear dish soap mixed with warm water will also work to slow down the glitter!